DIY Solar Panel Installation: Step-by-Step Guide for Homeowners
DIY Solar Panel Installation: Step-by-Step Guide for Homeowners
Understanding Solar Energy and Its Benefits
What is solar energy?
Solar energy is the radiant light and heat emitted by the sun, which can be harnessed using various technologies. The most common method for homeowners is through solar panels, which convert sunlight into electricity using photovoltaic (PV) cells. These cells are typically made from silicon and are designed to capture solar radiation, converting it into usable energy for residential applications. Solar energy is a form of renewable energy, meaning it is sustainable and can help reduce dependence on fossil fuels.
Benefits of using solar panels
- Environmental Impact: By utilizing solar energy, homeowners significantly reduce their carbon footprint. According to the U.S. Department of Energy, a typical residential solar power system can offset more than 100,000 pounds of carbon dioxide over its lifetime, which is equivalent to planting over 4,000 trees.
- Economic Advantages: Solar panels can lead to substantial savings on electricity bills. The Solar Energy Industries Association (SEIA) reports that homeowners can save an average of $20,000 over 20 years by switching to solar energy, especially when paired with solar battery systems for energy storage.
- Increased Property Value: Homes equipped with solar power systems often see a boost in property value. A study by the National Renewable Energy Laboratory found that homes with solar energy systems sell for about 4.1% more than similar homes without them.
- Energy Independence: By investing in a solar power system, including grid-tied or off-grid solar setups, homeowners can become less reliant on their local utility companies. This independence can be particularly beneficial during power outages.
How solar panels save you money
Installing solar panels can dramatically reduce energy costs. A typical solar panel system allows homeowners to generate their own electricity, which means they can rely less on grid energy and save on monthly utility bills. Additionally, many states offer incentives such as tax credits and rebates for solar panel installation, further reducing the upfront costs. For instance, California offers a Solar Investment Tax Credit (ITC) that allows homeowners to deduct 26% of the installation costs from their federal taxes.
Moreover, when combined with modern technologies like inverters and DIY solar kits, homeowners can easily manage their energy consumption and maximize efficiency. By utilizing energy-efficient appliances and integrating smart home technologies, they can ensure that their solar energy is used optimally, leading to even greater savings over time.
Types of Solar Panels and Their Applications
When considering a solar power system for your home, it’s crucial to understand the different solar panel types available. Each type has unique characteristics, benefits, and ideal applications, enabling homeowners to choose the option that best suits their energy needs and installation capacity.
Monocrystalline vs. Polycrystalline
Monocrystalline solar panels are known for their high efficiency and longevity, typically boasting an efficiency rate of around 15% to 20%. Made from a single crystal structure, they perform better in low-light conditions and have a sleek aesthetic, making them a popular choice for residential installations. For example, the SunPower Maxeon series is renowned for its durability and efficiency, often recommended for homeowners looking for long-term investment.
On the other hand, polycrystalline solar panels are made from multiple crystal structures, resulting in a lower manufacturing cost and a slightly lower efficiency rate, usually between 13% and 16%. While they tend to take up more space for the same power output compared to monocrystalline panels, they can be a cost-effective solution for homeowners with larger roofs or those looking to minimize initial installation expenses. Companies like Renogy offer reliable options in this category, making them a viable choice for budget-conscious consumers.
For homeowners seeking energy independence, a comprehensive guide to Installing Your Own Solar Panels Safely and Smartly is invaluable.
Thin-film Solar Panels
Thin-film solar panels represent another category, characterized by their lightweight and flexible design. These panels are made by layering photovoltaic material on a substrate, which allows for versatile installation options, including curved surfaces. While they typically offer lower efficiency rates (around 10% to 12%) compared to crystalline panels, their performance in high temperatures can make them suitable for specific climates. Brands like First Solar focus on this technology, providing solutions for both residential and commercial applications, particularly in large-scale projects.
Choosing the Right Solar Panel for Your Needs
When selecting the right solar panel, homeowners should consider several factors, including energy efficiency, available roof space, and budget. For those aiming for a DIY solar kit, understanding the compatibility with components like solar batteries and inverters is vital. Additionally, homeowners should evaluate whether a grid-tied system or an off-grid solar setup aligns better with their energy needs and lifestyle.
Ultimately, making an informed choice involves balancing upfront costs with long-term savings on energy bills. By understanding the pros and cons of each type, you can enhance your home's energy efficiency while contributing to a more sustainable future through renewable energy solutions.
Preparing for Your Solar Panel Installation
Assessing your property for solar suitability
Before embarking on your solar panel installation journey, it's crucial to assess your property’s suitability for harnessing renewable energy. Start by examining the orientation and pitch of your roof. Ideally, south-facing roofs with a slope of 15 to 40 degrees are most efficient in capturing sunlight. For instance, homes in sunny areas like Los Angeles often see a significant energy efficiency boost from solar panels due to optimal sun exposure.
Next, consider potential shading issues. Tall trees or nearby buildings can obstruct sunlight, reducing the efficiency of your solar power system. Tools like the Solar Pathfinder can help you analyze the sun's path and identify potential shading over the course of a year. Additionally, you should evaluate the structural integrity of your roof to ensure it can support the weight of the solar panel types you plan to install, such as monocrystalline or polycrystalline panels.
Permitting and regulations
Before installation, familiarize yourself with local permitting and regulations. Each municipality may have different requirements regarding solar installations. For example, in California, homeowners must comply with the California Solar Rights Act, which facilitates the installation of solar energy systems while ensuring that homeowners can access net metering benefits. It's advisable to check with your local building department or a solar installer to understand the necessary permits and inspections required for your project.
Additionally, explore any incentives available, such as federal tax credits or state rebates that can significantly reduce your installation costs. The Investment Tax Credit (ITC) allows you to deduct a substantial percentage of your solar installation costs from your federal taxes, promoting energy efficiency and encouraging homeowners to invest in renewable energy solutions.
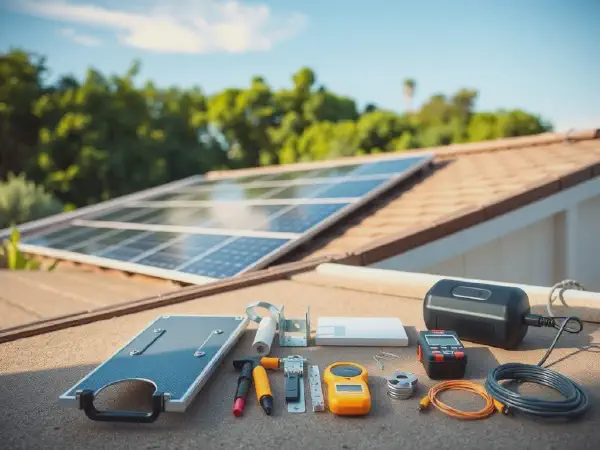
Gathering the necessary tools and materials
Once you have assessed your property and understood the regulatory landscape, gather the necessary tools and materials for your DIY solar installation. Essential items include solar panels, an inverter to convert DC power to AC, mounting hardware, and a solar battery for energy storage. If you're opting for a grid-tied system, ensure that you have the appropriate connection equipment to synchronize with your local utility grid.
For safety during installation, equip yourself with safety gear, including gloves, goggles, and a harness if working on a roof. Additionally, consider using DIY solar kits that come with all necessary components and detailed instructions, making the process smoother and more manageable for homeowners. Home improvement stores or specialized online retailers like Renogy offer a variety of kits suited for different energy needs, ensuring a comprehensive solution for your solar project.
Step-by-Step Guide to Installing Solar Panels
Installing solar panels can seem daunting, but with the right approach and tools, homeowners can successfully install a solar power system that enhances energy efficiency and contributes to renewable energy efforts. This guide provides a clear, detailed walkthrough for each phase of installation, ensuring safety and efficiency throughout the process.
Installing the mounting system
The first step in your solar panel installation is to set up a robust mounting system. This framework is essential as it holds the solar panels securely in place. For most residential applications, a roof-mounted system is common. You can use adjustable mounting brackets which allow for optimal solar exposure and can accommodate different roof pitches. Brands like IronRidge and Renusol provide DIY solar kits that include everything needed for a solid installation.
Before you begin, ensure that your roof is in good condition and can support the weight of the solar panels. It's vital to use a level to align the mounting brackets and secure them with appropriate fasteners, ensuring compliance with installation safety standards to prevent any accidents.
Connecting the solar panels
With the mounting system in place, the next step is to connect the solar panels. There are various types of solar panels, such as monocrystalline and polycrystalline, each offering different efficiency levels and price points. For instance, monocrystalline panels tend to have a higher efficiency rate, making them suitable for homeowners with limited roof space.
To connect the panels, start by laying them out on the mounting system in the desired configuration. Ensure that the panels are wired in a series or parallel configuration based on your system design. Use high-quality connectors and follow the manufacturer’s instructions to ensure a secure fit. Proper connection is crucial for maximizing energy output from your solar battery and ensuring that your system functions efficiently.
Wiring the system to your inverter
Once the solar panels are connected, the next step involves wiring the system to your inverter. The inverter is a key component that converts the direct current (DC) produced by the solar panels into alternating current (AC) suitable for home use. For many homeowners, a grid-tied system is preferred as it allows for easy integration with the local utility grid.
Begin by connecting the solar panel output to the inverter’s input terminals. Ensure that all connections are tight and secure to avoid any electrical issues. If you are installing an off-grid solar system, connect the inverter to the battery bank, which will store excess energy for later use. It is advisable to consult the inverter’s manual for specific wiring instructions, as different models may have unique requirements. Remember, safety is paramount; always turn off the power before making any connections and consider hiring a professional if you are unsure about the electrical work involved.
Safety Precautions When Installing Solar Panels
Personal protective equipment (PPE)
Before beginning your solar panel installation, it is essential to equip yourself with the right personal protective equipment (PPE). This includes safety glasses to protect your eyes from debris, gloves to prevent cuts and abrasions, and a hard hat if you are working in an area where falling objects may pose a risk. Non-slip footwear is also crucial to maintain traction on rooftops or other elevated surfaces. The use of high-visibility clothing can further enhance safety, especially if you’re working near roadways or in populated areas.
Electrical safety tips
When dealing with a solar power system, electrical safety cannot be overstated. Always ensure that the power is turned off at the breaker box before beginning any installation work. For grid-tied systems, double-check that all connections are secure and insulated to prevent short circuits. If you are using a solar battery or inverter, familiarize yourself with the specific requirements for handling these components, as they can store significant energy. Additionally, it’s advisable to have a qualified electrician inspect your work, especially if you are inexperienced with electrical systems.
Common installation hazards to avoid
Several hazards can arise during the installation of solar panels, and being aware of them is key to ensuring installation safety. One of the most common risks is falling from rooftops, which can be mitigated by using proper ladders and harnesses. Ensure that your work area is clear of clutter and obstacles to prevent tripping hazards. Be cautious of weather conditions; installing panels during high winds or storms can increase the risk of accidents. Lastly, always check for overhead power lines and ensure you maintain a safe distance when working with tools and equipment.
Maintaining Your Solar Panel System
Regular maintenance checks
To ensure the longevity and efficiency of your solar power system, it’s crucial to schedule regular maintenance checks. Homeowners should aim for at least two inspections per year. During these checks, assess the overall condition of the solar panel types you have installed, whether they are monocrystalline, polycrystalline, or thin-film panels. Look for any physical damage, loose connections, or signs of wear on components like the inverter and solar battery. Conducting these checks can prevent costly repairs and ensure your system operates at peak energy efficiency.
Cleaning solar panels
Cleaning your solar panels is an essential part of maintenance that can significantly impact their performance. Dust, debris, and bird droppings can accumulate on the surface, blocking sunlight and reducing energy output. For most homeowners, a simple rinse with a garden hose can be effective, especially during cooler times of the day to avoid thermal shock. If you live in an area with heavy rainfall, you might not need to clean them often; however, it's wise to inspect them after storms. For regions with minimal rainfall, consider using a soft brush or a squeegee with a long handle, ensuring you don't use abrasive materials that could scratch the panels.
Troubleshooting common issues
Even with proper maintenance, issues may arise with your solar panel system. One common issue is a drop in power output. If you notice this, check the inverter display for error codes; many modern inverters provide diagnostic information. Ensure that there are no obstructions casting shadows on your panels, which can occur with tree growth or new construction nearby. If the system is grid-tied, contact your utility provider to ensure there are no outages affecting your power supply. For off-grid solar setups, make sure your solar battery is functioning correctly and has enough charge to meet your energy needs.
By following these maintenance tips, homeowners can maximize the efficiency of their DIY solar kits and ensure their renewable energy systems remain a reliable source of energy for years to come.
Cost Considerations and Financial Incentives
Breakdown of installation costs
When considering a DIY solar panel installation, it's essential to understand the upfront costs associated with the project. The average price for solar panel installation ranges from $15,000 to $25,000 for a typical residential system, depending on the size and type of solar panels chosen. For example, monocrystalline solar panels, known for their high efficiency and longevity, tend to be on the higher end of the cost spectrum, while polycrystalline panels may offer a more budget-friendly option. Additionally, installation costs can vary based on factors such as labor, permitting, and the inclusion of components like inverters and solar batteries.
Available tax credits and rebates
Homeowners can significantly offset the initial investment in solar power systems through various tax credits and rebates. In the United States, the federal government offers a Investment Tax Credit (ITC) that allows homeowners to deduct 26% of the installation costs from their federal taxes. This incentive is applicable to all types of solar systems, including grid-tied and off-grid solar installations. Additionally, many states and local governments offer their own rebates and incentives, which can further reduce the overall cost. For example, California provides additional rebates for energy efficiency measures, making it easier for homeowners to transition to renewable energy.
Financing options for solar projects
For homeowners who may not have the upfront capital to invest in solar panel installation, there are several financing options available. One popular choice is a solar loan, which allows homeowners to finance the system's cost over time while reaping the benefits of energy savings immediately. Another option is a power purchase agreement (PPA), where a third party owns the solar system and homeowners pay for the electricity generated at a predetermined rate. DIY solar kits are also available for those looking to minimize costs while still investing in energy efficiency. By carefully considering these financial incentives and options, homeowners can make an informed decision that not only enhances their property’s value but also contributes to a sustainable future.
Real-Life Case Studies and Experiences
Interviews with DIY Solar Installers
Many homeowners have turned to DIY solar installations, driven by the desire for energy efficiency and cost savings. One such homeowner, Sarah Thompson from Tucson, Arizona, successfully installed her solar power system using a DIY solar kit from Renogy. In our interview, she emphasized the importance of researching solar panel types before starting the project. “I chose monocrystalline panels for their efficiency,” Sarah explained. “They may be pricier, but the long-term savings on my energy bills justified the cost.” Moreover, she highlighted the role of inverters in maximizing solar energy use, stating, “A quality inverter is crucial for converting the DC electricity generated by the panels into usable AC electricity.”
Success Stories from Homeowners
Another inspiring case is that of John and Lisa Martinez, who live off-grid in Colorado. They opted for a combination of grid-tied systems and off-grid solar solutions. By integrating a solar battery system from Tesla, they were able to store excess energy generated during the day for use at night. “The transition to solar has not only reduced our carbon footprint but also our electricity costs by more than 70%,” they shared. Their investment in a comprehensive solar power system, which included both panels and storage, has proved to be both environmentally friendly and economically viable.
Common Challenges Faced and How to Overcome Them
Despite the benefits, DIY solar installations can come with challenges. One common issue is ensuring installation safety. For instance, during a DIY project in Seattle, homeowner Mark Johnson faced the challenge of proper roof mounting. “I underestimated the complexity of the installation safety,” he admitted. To overcome this, he consulted online forums and local solar installation groups for guidance, which he found invaluable. Additionally, he learned about the importance of local regulations regarding solar installations, ensuring his project complied with municipal codes. By leveraging community resources and expert advice, Mark successfully completed his installation, contributing to the renewable energy movement.
Frequently Asked Questions
Is it hard to install solar panels yourself?
While DIY solar panel installation is possible, it requires proper research, tools, and electrical knowledge to ensure safety and compliance with local codes.
What permits do I need to install solar panels?
Permit requirements vary by location; typically, a building permit is needed, along with an electrical permit, which your local authority can provide.
How long does it take to install solar panels?
A typical DIY solar panel installation can take 1-3 days, depending on the system size and the installer’s experience.
Can I install solar panels on my own if I'm not an electrician?
You can install solar panels without being a licensed electrician, but familiarity with electrical work and safety is crucial.
What tools do I need for solar panel installation?
Essential tools include a drill, wrench set, socket set, measuring tape, and safety equipment such as gloves and goggles.